How to Seal Slab Edges Properly (Avoid First Pass Fails)

  1. Home
  2. »
  3. Make-up Air Design
  4. »
  5. Author Blogs

How to Seal Slab Edges Properly: The Details Costing Builders First Pass Compliance

Posted by Joel Symmans

Key Takeaways

Most slab edge air leakage comes from discontinuous membrane laps, not from a single obvious gap.

Penetrations sealed after the slab is poured are harder and more expensive to fix than penetrations sealed during the pour.

Movement joints need a flexible seal, not a rigid one, or they will crack open under normal building movement.

Site sequencing, not product choice, is the biggest driver of slab edge sealing failures.

The team that designed the airtightness strategy is best placed to diagnose why a slab edge is leaking, because they know why every detail was specified that way.

Builders rarely lose first pass compliance on the big, obvious stuff. They lose it on the slab edge: metres of perimeter detail that gets treated as a formwork problem instead of an airtightness problem. Get it wrong and you are back on site after the concrete has cured, chasing a leak path that would have taken minutes to seal properly the first time.

Why Slab Edge Sealing Fails More Often Than It Should

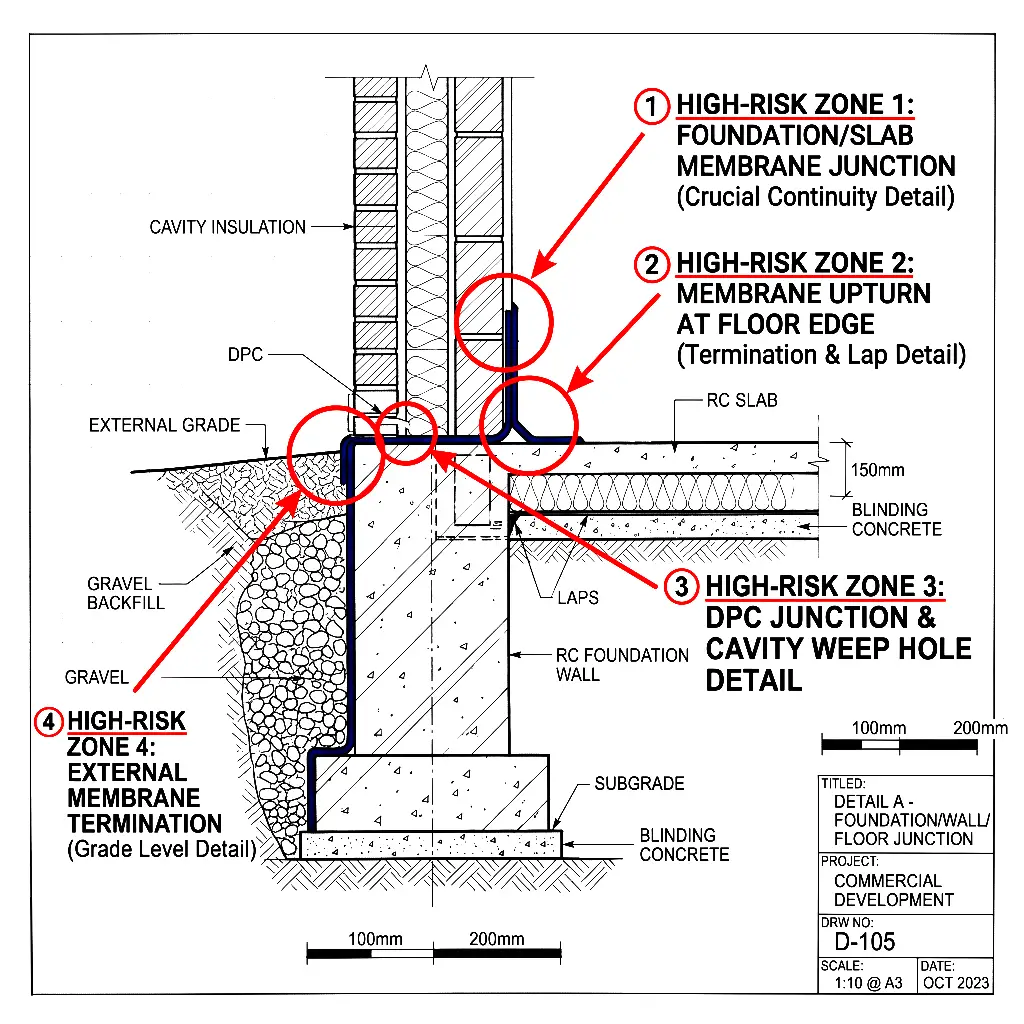
The slab edge sits at the junction of two trades who rarely talk to each other: the concreter, who is focused on strike time and formwork strip, and whoever installs the air barrier membrane, who is often working days or weeks later. Neither is thinking about airtightness as a system. They are thinking about their scope.

That handover gap is where leakage gets built in. Not through bad materials. Through bad sequencing.

The Most Common Slab Edge Sealing Mistakes

Fault 01

Discontinuous Membrane Laps

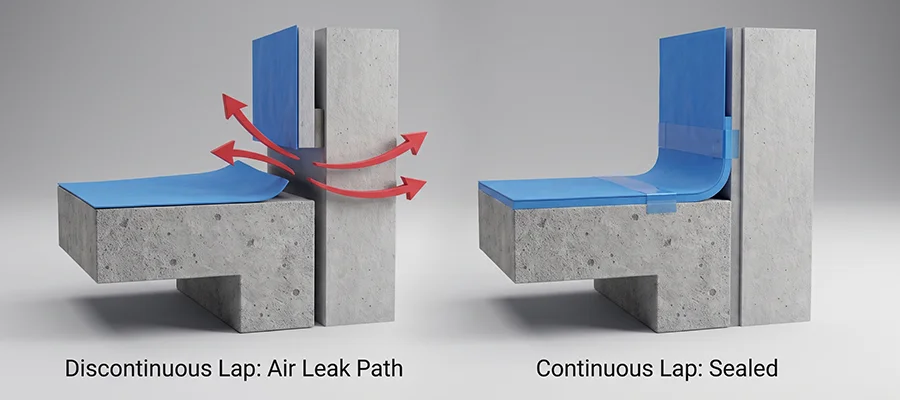
A membrane that looks continuous from a distance often has laps that were never fully pressed, taped in the wrong direction, or interrupted at a corner. Under a blower door test at 50 Pa, air finds every one of those gaps. This is the single biggest contributor to failed slab edge results.

Fault 02

Penetrations Sealed as an Afterthought

Plumbing, electrical, and drainage penetrations through the slab edge are frequently sealed after the membrane is already installed, using whatever sealant is on the truck that day. Sealing the penetration collar as the service goes in, as part of the original detail, is faster, cheaper, and far more reliable.

Fault 03

Movement Joints Left Untreated

Slab edges move. If the joint is sealed with a rigid product instead of a flexible airtight sealant rated for movement, it will crack within the first year and the leak path reopens, even though the test passed on day one.

Fault 04

Poor Sequencing Between Trades

This is the root cause behind the first three. When the airtightness detail is not written into the trade program, whoever finishes last inherits a problem they did not create and cannot easily fix.

Diagram comparing discontinuous versus continuous slab edge membrane laps
Membrane lap comparison diagram, correct vs incorrect

What Proper Slab Edge Sealing Actually Looks Like

CONTINUOUS LINE

A continuous air barrier line, not isolated patches

This is the root cause behind the first three. When the airtightness detail is not written into the trade program, whoever finishes last inherits a problem they did not create and cannot easily fix.

SELECTION

Correct membrane selection and lap direction

Not every membrane is rated for the exposure and movement a slab edge will see. Selection matters as much as installation, and lap direction should always shed water and air away from the joint, not into it.

SEQUENCING

Sealing services and penetrations as they go in, not after

Every penetration should be sealed at the point of installation, using a product and detail specified for that exact penetration type, so nobody is retrofitting a seal around a pipe that is already cast in place.

Why Design Intent Matters More Than the Test Itself

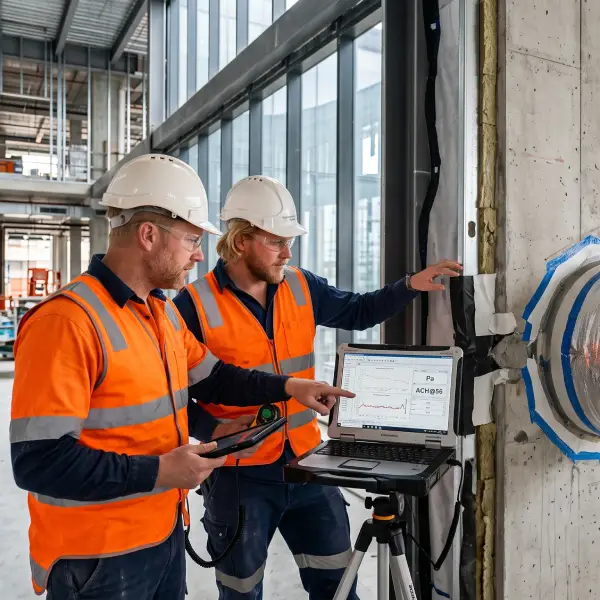
Anyone can point a blower door at a building and get a number. Far fewer people can look at that number, walk the slab edge, and know exactly why the leakage is happening.

That takes knowledge of why the membrane terminates where it does, why a particular detail was selected over an alternative, and where the interfaces were always going to be the hardest part of the build.

The test does not create airtightness. It verifies whether the original design intent was actually delivered.

The Aerotight Approach: Design. Verify. Deliver.

This is why airtightness design and airtightness verification should never be split across two consultants. Airtight buildings are not achieved through testing. They are achieved through informed design, consistent implementation on site, and independent verification by the team that understands the original design intent.

The greatest value is not in the final test. It is in having one technical partner responsible for the airtightness strategy from concept through to verification, reducing uncertainty and helping builders deliver the building as it was actually designed.

That is why Aerotight builds every project the same way: design the strategy, workshop it with the trades, review it on site, test preliminarily while issues are still accessible, then verify formally against AS/NZS ISO 9972. One team, one line of accountability, from the first drawing to the final report.
Building airtightness inspection and blower door testing used to identify air leakage
Airtightness Guide

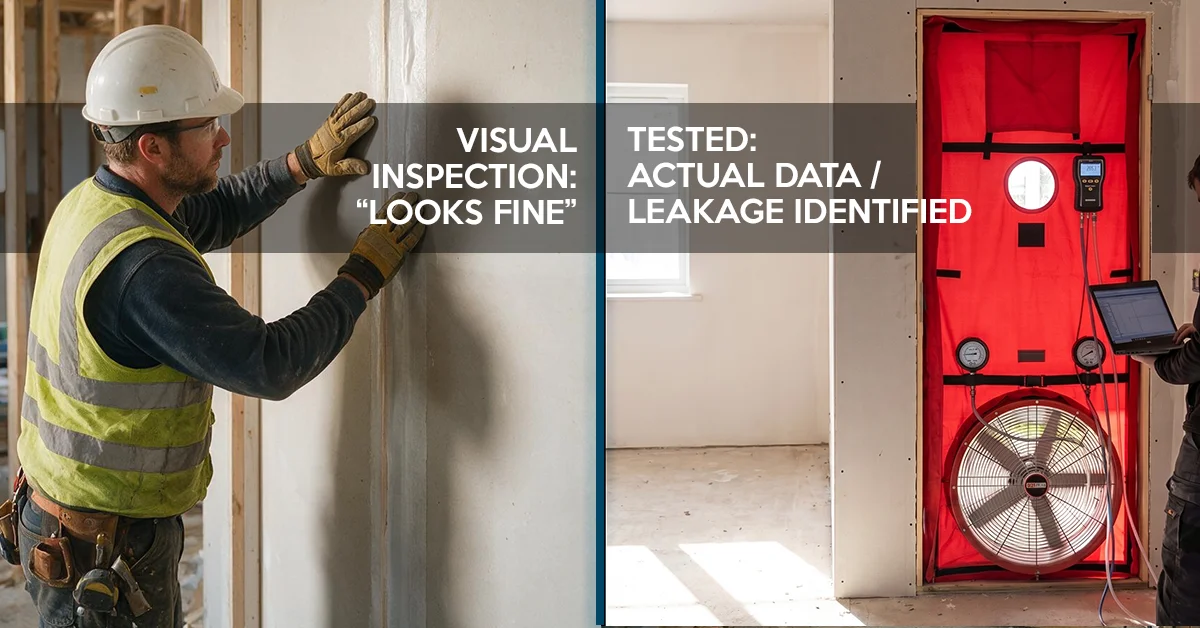
Airtightness Compliance: Visual Inspection Isn’t Enough

Home Airtightness Compliance: Why Passing Visual Inspection Doesn’t Guarantee You’ll Pass the Test Posted by Joel Symmans Key Takeaways A visual inspection checks whether seals ...
Read More →
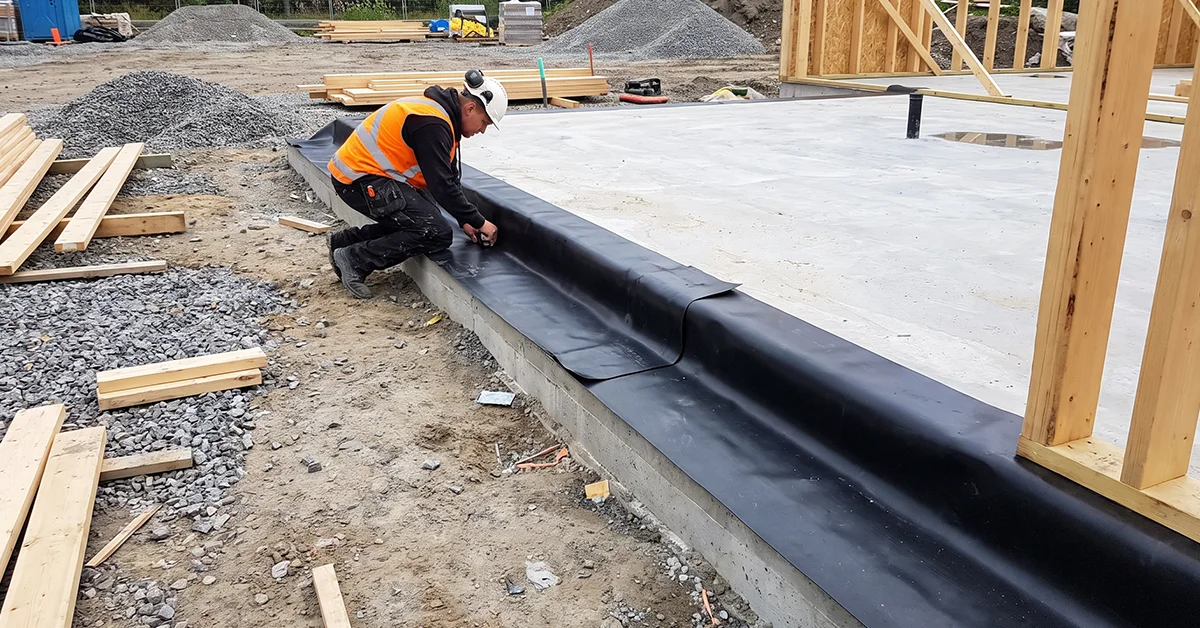
Continuous airtightness membrane being sealed along a slab edge on site
Make-up Air Design

How to Seal Slab Edges Properly (Avoid First Pass Fails)

Home How to Seal Slab Edges Properly: The Details Costing Builders First Pass Compliance Posted by Joel Symmans Key Takeaways Most slab edge air leakage ...
Read More →
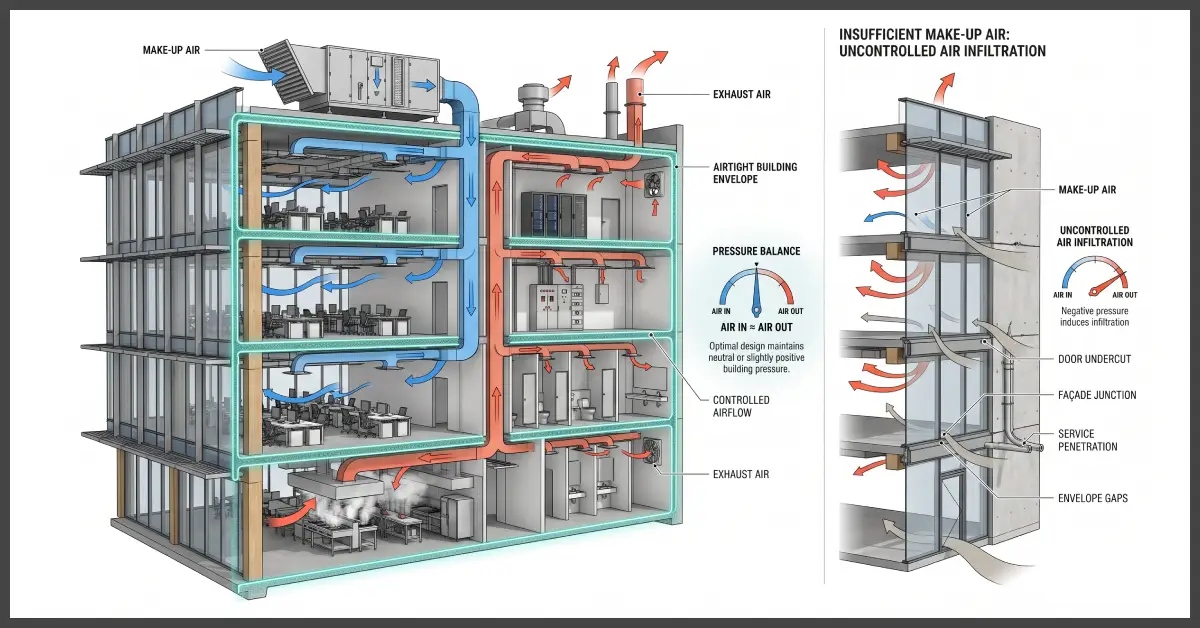
Diagram showing make-up air and exhaust balance in a building
Make-up Air Design

What Make-Up Air Design Is Actually Trying to Achieve

Home What Make-Up Air Design Is Actually Trying to Achieve Posted by Joel Symmans Key Takeaways The Core Purpose of Make-Up Air: Make-up air replaces ...
Read More →

Get Slab Edge Sealing Right the First Time

If your next pour is coming up and the slab edge detail has not been reviewed against your airtightness strategy, that is the cheapest moment to fix it.

Talk to us before your next pour and we will walk the detail with you.

Need airtightness testing for compliance or project verification? Submit the form and our team will reach out to you shortly.

Name(Required)
This field is for validation purposes and should be left unchanged.

What Make-Up Air Design Is Actually Trying to Achieve

What Make-Up Air Design Is Actually Trying to Achieve

Posted by Joel Symmans

Key Takeaways

The Core Purpose of Make-Up Air: Make-up air replaces air removed by exhaust systems (kitchens, bathrooms, cleanrooms) to maintain pressure balance and prevent unconditioned air from being pulled through hidden gaps in the building envelope.

Design vs. Site Reality: Make-up air systems often fail on-site due to discrepancies between assumed envelope airtightness and actual as-built conditions, mid-project design revisions, and delayed commissioning.

Severe Compliance and Operational Costs: Pressure imbalance causes non-compliance with building standards (like NCC and AS/NZS ISO 9972), increases energy consumption, accelerates mechanical wear, and creates occupant discomfort (draughts, odours, slamming doors).

Diagnostics Require Context: Measuring pressure differential (e.g., air leakage at 50 Pa) provides a number, but understanding why a leak exists requires deep knowledge of the original design intent and building envelope details.

Integrated Strategy Beats Testing Alone: Achieving proper pressure balance requires connecting early-stage design strategy directly with handover verification, rather than treating testing as an isolated pass/fail exercise.

Make-up air exists to replace air removed by exhaust systems: kitchen extraction, bathroom fans, industrial ventilation, fume cupboards. Without it, a building pulls air from wherever it can find a gap: door undercuts, service penetrations, gaps in the envelope itself. That’s how a well-intentioned mechanical design quietly turns into an airtightness problem.

The goal on paper is simple: balance what leaves the building with what comes back in, at the right location, at the right pressure. The goal on site is a lot harder to hit.

Where Make-Up Air Design Breaks Down

The Gap Between Drawings and Installed Reality

A make-up air calculation is only as good as the envelope it assumes. If the drawings assume a certain level of airtightness and the as-built envelope leaks more (or less) than that assumption, the whole balance shifts. Dampers get value-engineered. Ducting routes change on site. A door schedule gets revised after the mechanical design was locked in. None of these show up as a “mechanical fault”.

They show up as a failed pressure diagnostic weeks or months later.

Why Exhaust and Supply Rarely Balance on Site

Exhaust systems are usually installed and commissioned first, because they’re tied to life safety and health compliance.

Make-up air is frequently the last system commissioned, if it’s commissioned properly at all.

By the time anyone tests pressure differentials, the building has already been operating unbalanced for weeks. Occupants notice draughts, doors that won’t close properly, or rooms that never feel right. Nobody connects it back to a mechanical design decision made a year earlier.

The Real Cost of Getting Make-Up Air Wrong

Compliance Risk

Under the NCC and AS/NZS ISO 9972, a building that can’t hold its designed pressure differential isn’t just uncomfortable, it’s non-compliant.

For healthcare, laboratories, cleanrooms and data centres, pressure control isn’t a comfort feature. It’s the mechanism that keeps contamination out (or in).

A failed diagnostic at this stage is expensive to fix and hard to explain to a client who thought the building was finished.

Operational and Comfort Risk

Even outside regulated environments, unbalanced pressure drives up energy costs as conditioned air escapes and unconditioned air is pulled in to replace it.

It also accelerates wear on mechanical systems working harder than they should and generates the kind of soft complaints (draughts, odours, doors that slam) that erode confidence in an otherwise well-built project.

What Pressure Diagnostics Actually Measure

Pressure diagnostics use a calibrated high value and proprietary equipment setup to establish a differential pressure, typically 50 Pa, and measure how much air moves through the envelope to maintain it. That single number, expressed in m³/h/m² of envelope area, tells you how airtight the building actually is against what was designed.

But the number on its own doesn’t tell you why. That’s the difference between a test result and a diagnosis. Locating the specific junction, membrane termination, or duct penetration causing the imbalance takes someone who understands why that detail was specified in the first place, not just someone who can operate the equipment.

Why Design Intent Matters More Than the Test Result

Anyone can measure airflow. Far fewer people can explain why leakage is occurring at a specific point in the building.

The consultant who developed the original airtightness strategy knows why a membrane terminates where it does, why a particular detail was chosen over the alternative, and which interfaces were flagged as high-risk from day one. That context is what turns a failed pressure test from a mystery into a fixable, understood problem.

A test isn’t there to pass or fail a building in isolation. It’s there to confirm whether the envelope was delivered in line with the strategy that was agreed at the start.

The Aerotight Approach: Design. Verify. Deliver.

Airtight buildings aren’t achieved through testing. They’re achieved through informed design, consistent implementation on site, and independent verification carried out by a team that still understands the original design intent.

That’s why Aerotight doesn’t treat design and verification as two separate services handed to two separate consultants. The same team that identifies make-up air and pressure risk at the schematic stage is the team running the diagnostics at handover, through our 8-step testing process, from project scope through to final report.

When something doesn’t balance, we’re not starting from zero. We’re checking it against the strategy we built with you.

If your project has a make-up air or pressure balancing issue that’s proving hard to diagnose, get in touch with the team. We’d rather find the cause with you than send you a number and a shrug.

Aerotight consultant discussing make-up air and airtightness strategy with a client

Frequently Asked Questions

What causes a make-up air system to fail a pressure test?

Most commonly, a mismatch between the airtightness assumed in the mechanical design and the airtightness actually achieved on site, combined with commissioning sequencing that tests exhaust before make-up air is properly balanced.

Is a failed pressure diagnostic always a compliance fail?

Not necessarily, but for regulated environments like laboratories, cleanrooms and healthcare facilities, an unresolved pressure imbalance can put NCC and standard-specific compliance at risk, which is why early diagnostics matter more than a single test at the end.

Who should carry out pressure diagnostics: the mechanical contractor or the airtightness consultant?

Both play a role, but diagnosis is faster and more accurate when it’s led by whoever developed the original airtightness and pressure strategy, since they understand the design intent behind every detail being tested.
Building airtightness inspection and blower door testing used to identify air leakage
Airtightness Guide

Airtightness Compliance: Visual Inspection Isn’t Enough

Home Airtightness Compliance: Why Passing Visual Inspection Doesn’t Guarantee You’ll Pass the Test Posted by Joel Symmans Key Takeaways A visual inspection checks whether seals ...
Read More →
Continuous airtightness membrane being sealed along a slab edge on site
Make-up Air Design

How to Seal Slab Edges Properly (Avoid First Pass Fails)

Home How to Seal Slab Edges Properly: The Details Costing Builders First Pass Compliance Posted by Joel Symmans Key Takeaways Most slab edge air leakage ...
Read More →
Diagram showing make-up air and exhaust balance in a building
Make-up Air Design

What Make-Up Air Design Is Actually Trying to Achieve

Home What Make-Up Air Design Is Actually Trying to Achieve Posted by Joel Symmans Key Takeaways The Core Purpose of Make-Up Air: Make-up air replaces ...
Read More →

Get a preliminary blower door test before your compliance test!

Find out which of these 10 details are leaking while they’re still cheap to fix. Book an appointment with Aerotight.

Need airtightness testing for compliance or project verification? Submit the form and our team will reach out to you shortly.

Name(Required)
This field is for validation purposes and should be left unchanged.